How do you use a 6-volt battery load tester for a golf cart

How Do You Use a 6-Volt Battery Load Tester for a Golf Cart?

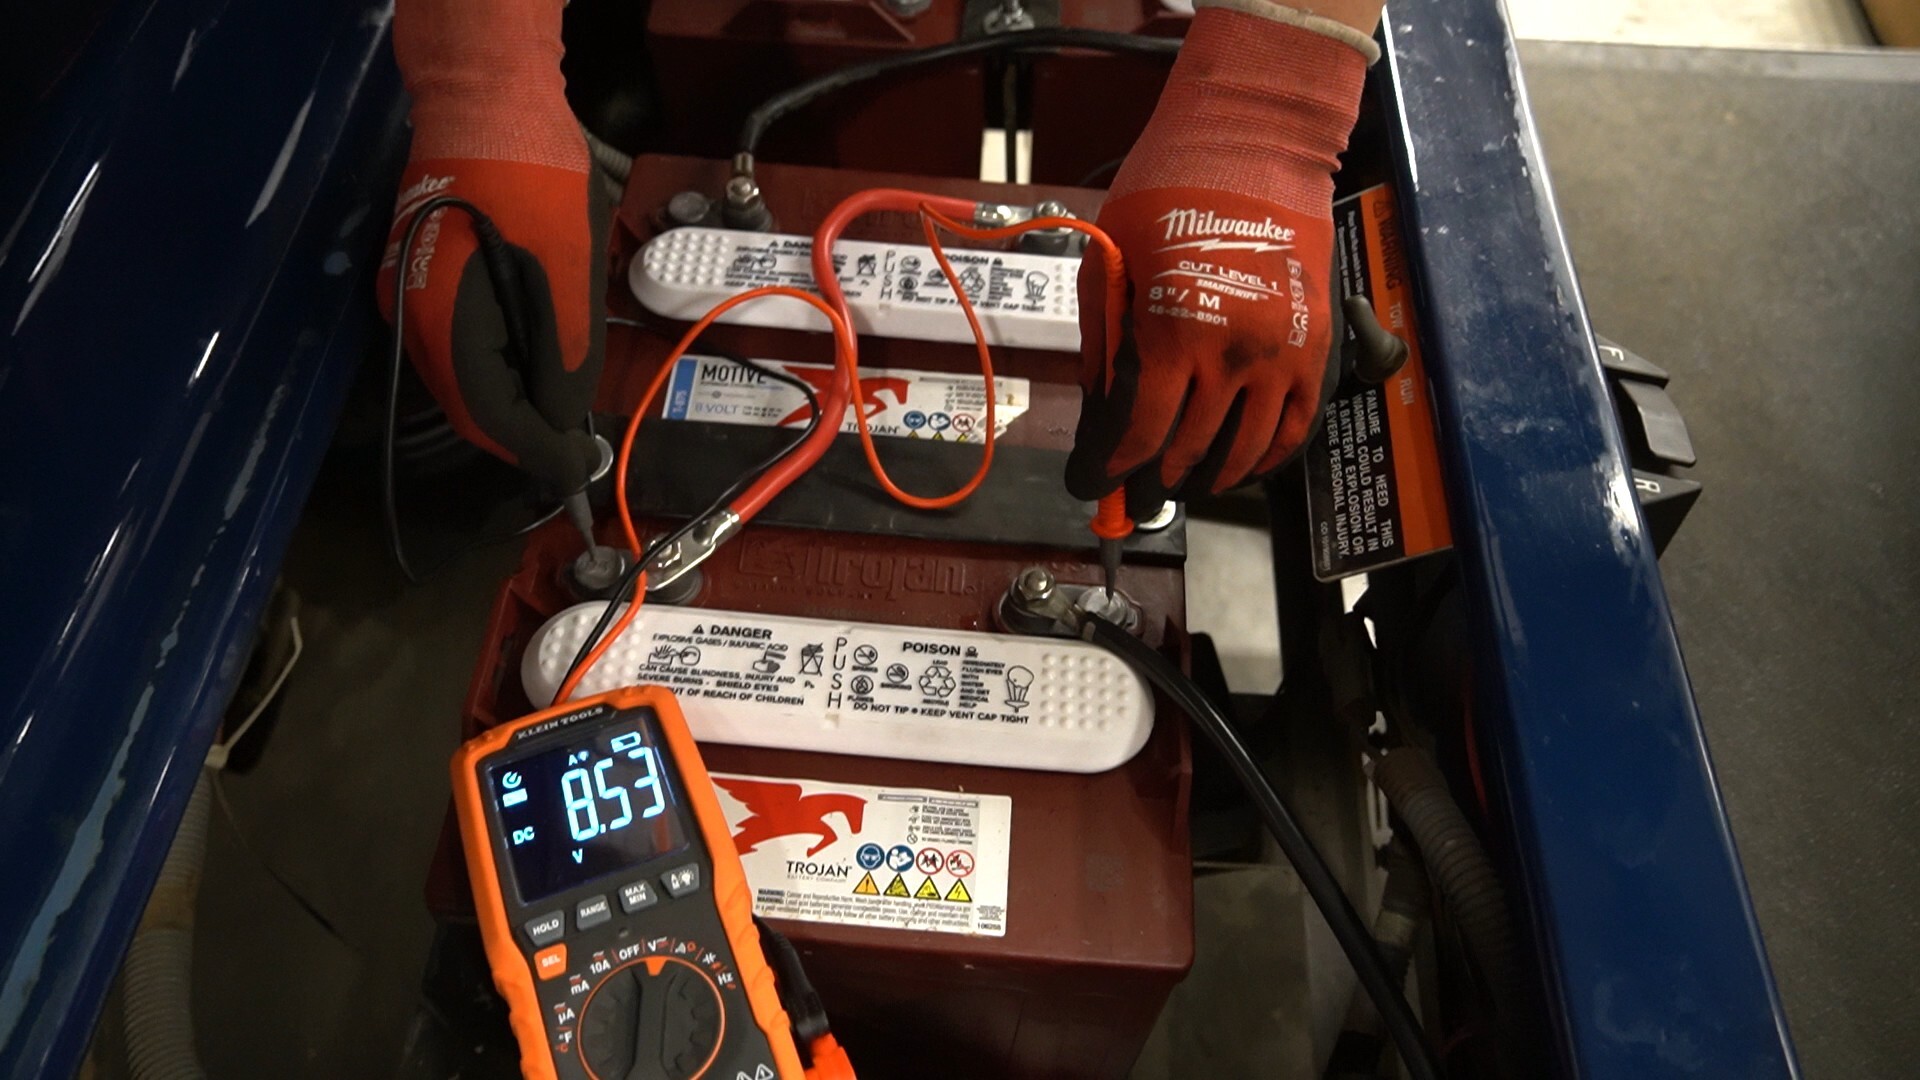
To verify real battery health fast: fully charge, clamp a 6-V tester to one battery, apply a 10–15 s load, and confirm voltage remains above the maker’s spec.

Whether you maintain one cart or a small fleet of golf carts, a 6-volt load tester is the quickest way to find weak batteries that hide behind “OK” resting voltage. This guide explains the right setup, a precise step-by-step process, and how to read results accurately—so you can keep range strong and downtime low.

What a Load Test Proves

Open-circuit voltage shows state of charge; a load test shows capacity under stress. A healthy 6-V deep-cycle battery will hold voltage for 10–15 seconds at the tester’s rated load (often ~75–150 A for 6-V units) at room temperature. Weak batteries sag quickly and recover slowly.

Step-by-Step Guide

1) Charge and Rest the Batteries

  • Fully charge the pack until the charger completes its cycle.
  • Let batteries rest 1–2 hours to bleed off surface charge for accurate readings.
  • Turn the cart OFF; if equipped, set Tow/Run to Tow; disconnect external chargers/accessories.

2) Inspect the Batteries

  • Look for loose cables, corrosion, bulging cases, or low electrolyte. Correct issues first.
  • Neutralize light corrosion with baking soda/water, rinse, dry, and torque terminals per spec.

3) Connect the Load Tester

  • Test one 6-V battery at a time while it remains in the pack.
  • Red clamp → positive (+), black clamp → negative (−) on the same battery.
  • Ensure clean metal contact—no paint, oxidation, or loose jaws.

4) Apply the Load

  • Follow the tester instructions; most specify a 10–15 s load.
  • For carbon-pile models, set current appropriate for a 6-V deep-cycle battery (see tester or battery maker guidance).
  • Test near 70–80°F (21–27°C) for consistency; temperature affects voltage.

5) Read the Voltage

  • Observe the meter at the 15-second mark.
  • A sudden plunge with continued drop = weak plates/sulfation. A steady hold = healthy battery.

6) Interpret the Results

Always compare to the manufacturer’s spec. As a practical field guide at ~77°F (25°C) under an appropriate load:

Loaded Voltage (≈15 s) Likely Condition* Action
≥ 5.3–5.4 V Good / strong Return to service; recheck on routine schedule.
≈ 5.1–5.3 V Serviceable Keep in service; monitor more frequently.
< 5.0–5.1 V Weak / failing Try a conditioning charge; plan replacement if low under-load voltage persists.

*Guidance only—use the battery brand’s published thresholds when available.

7) Repeat for All Batteries

  • Record each battery’s resting voltage and loaded voltage using the same load and duration.
  • Flag outliers. A single weak 6-V unit drags the whole series pack, causing imbalance and reduced range.

How to Check Battery Health with a Load Tester (Quick View)

  1. Fully charge → rest 1–2 hours.
  2. Inspect/clean terminals; ensure plates are covered with electrolyte (top up with distilled water after charging if needed).
  3. Clamp tester red to +, black to − on one 6-V battery.
  4. Apply the tester’s rated load for 10–15 s.
  5. Read and log the loaded voltage; compare to spec.
  6. Repeat for each battery; replace weak units in matched sets when required.

Temperature & Test Accuracy

  • Cold weather: Expect slightly lower loaded voltage; batteries deliver less current when cold.
  • Heat: Voltage may sit a touch higher, but heat accelerates water loss—monitor electrolyte more often.

Common Mistakes to Avoid

  • Testing right off the charger: Surface charge masks weakness—always rest before testing.
  • Dirty/loose clamps: Poor contact yields false lows; clean and retest.
  • Inconsistent procedure: Keep load and duration identical for every battery to compare apples to apples.
  • Ignoring one “bad actor”: Replace failing batteries promptly; one weak unit stresses the rest.
  • Wrong chemistry: Do not carbon-pile load-test lithium packs; this guide targets flooded/AGM lead-acid.

Safety Essentials

  • Wear eye protection and gloves; keep a baking-soda solution handy to neutralize acid residue.
  • Ensure good ventilation; avoid sparks/flames near charging batteries.
  • Secure tools and leads; avoid shorting across terminals.

After the Test: Care Tips

  • Recharge the pack to replace energy used during testing.
  • Keep terminals clean/tight; corrosion causes voltage drop and heat.
  • Check electrolyte monthly and use distilled water to keep plates covered (only after charging).

Bottom Line

A proper 6-V load test—charge, rest, clamp, load for 10–15 seconds, then compare voltage to spec—reveals battery strength that a simple meter can’t. Log each battery, address weak units before they pull the pack down, and maintain clean connections. Used routinely, this simple procedure preserves range, boosts reliability, and extends the service life of your cart’s power system.

Leave a Reply

tara golf cars, tara electric golf cars, tara golf fleet, best golf car, fleet cars, 2025, club car, ezgo, yamaha, alternatives, golf courses, golf club,
[newsletter_form]